How to Send Interactive Messages
Step 1. Once you have logged into the online portal you will be brought to your Help Center screen. From here, click on the first Manage SMS icon at the top.

Step 2. A drop down will appear. Select “Message Details”

Step 3. On your Manage Your Text Messages screen, click the “+Create New Message” button. Then select “New Interactive”

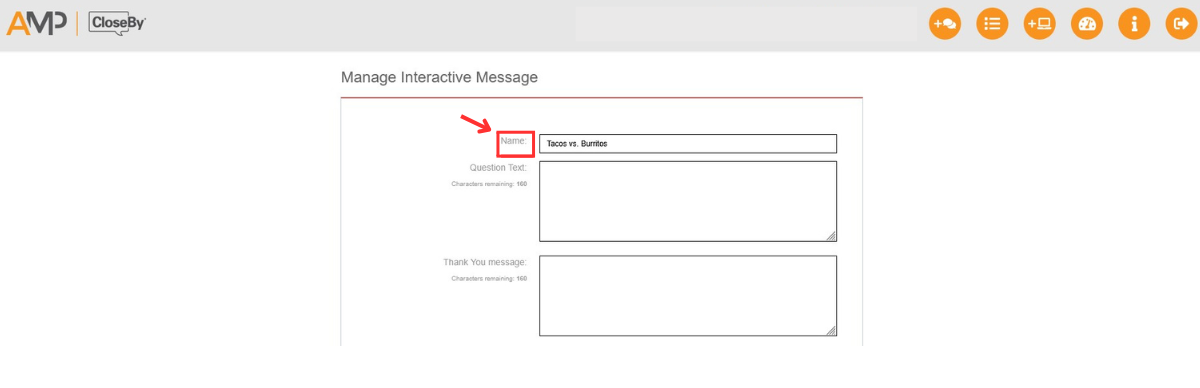
Step 4. You are now in your Manage Interactive Messages screen. From here, we will create our message. The first section is listed as “Name.” Message Name makes it easy to name your message and to find past messages. This name is for your records. Your contacts will not see this name.
Step 5. In the “Question Text” box we will type our message or question.

Step 6. Once we have entered our question we would like to ask, we will put together a “Thank You Message.” The thank you message will be sent to your contacts immediately after they reply to your question.

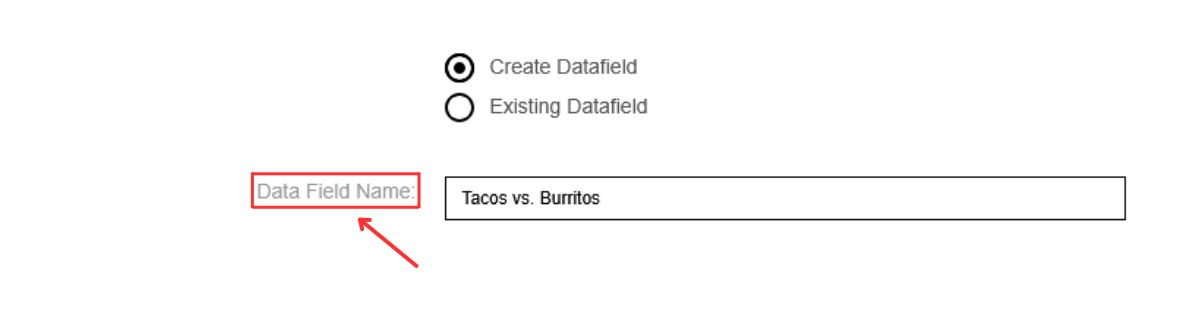
Step 7. Select your Datafield. The Datafield is a bucket of where your answers will go. You will select Create Datafield to create a new one.

Step 8. Name your Datafield. This is essentially naming your bucket of answers. It can be labeled the same as your Message Name at the top.
Step 9. Select you Data Field Type. This will tell the system how you want it to pull messages.
- First Word = System will only pull the first word in the contacts’ response
- Example: Contact responds “I love Tacos so much!” we will only see “I” in the answers since it was the first word.
- Full Text = System will pull the full text that the contact responds with
- Example: Contact responds “I love Tacos so much!” we will see that entire response.
- Pattern Match = System will only look for the selected type of response. Selections include Full Name, Email, Yes/No, Phone #, Zip Code, ABCD, M/F, Stat Abbreviation

Note — If you have selected a Pattern Match Data Field Type you will need to enter an Invalid Response — “Invalid Response. Reply back A or B”

Step 10. Once we have our Interactive Message put together, select “Create”

Step 11. You will be brought to a screen telling you that your Interactive Message has been created. From here, click “Send Interactive Message”

Step 12. You are brought to your Message Details Screen where you can send/schedule/draft/reoccur this message! Select your Delivery Option and congratulations! You have sent an Interactive Message!

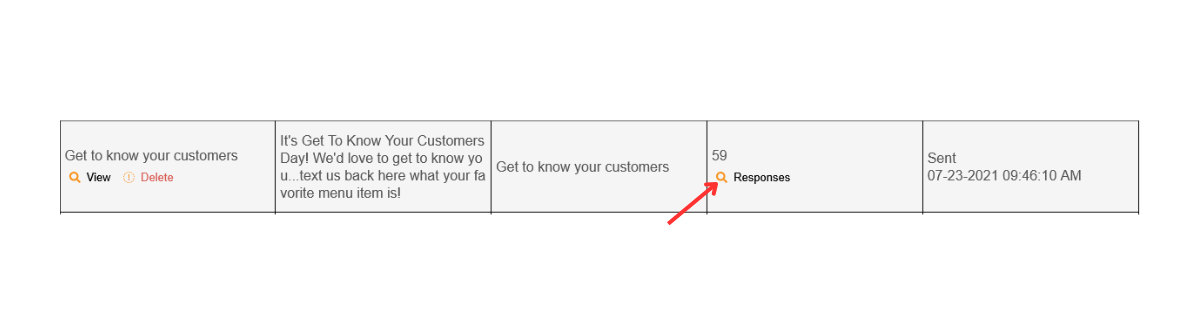
How to view your answers:
1. Go to your Message Details under Manage SMS

2. Click “Interactive Messages”

3. Click the magnifying glass to view your responses under your Interactive Message!